The era of creating a blog without coding has arrived
If you have been putting off starting your own blog because you don't know how to code, that reason is now gone. If you say "Make me a blog" to the AI, a working HTML blog file is generated. With just free hosting and an FTP program, anyone can upload their own blog to the internet.
This article explains the entire process step-by-step of uploading an HTML file generated by AI directly to DotHome free hosting without installing WordPress. All you need are three things: an AI tool, DotHome free hosting, and ALDrive.
There are four key steps to creating a blog using this method
If you understand the entire process in advance, you won't get lost at any stage. Applying for DotHome hosting, generating an HTML file with AI, uploading the file to ALDrive, and checking in a browser—these four steps are all there is to it. Let's look at each step in order.
Why an HTML Static Blog Instead of WordPress
Disadvantages of WordPress
While WordPress is a powerful tool, its disadvantages are distinct in free hosting environments. Page loading speeds are slow, plugin conflicts occur frequently, and security updates must be managed continuously. For those starting a blog for the first time, the barrier to entry is actually high.
Advantages of an HTML Static Blog
HTML blogs generated by AI have a simple structure. You just need to upload a few files to the server. It is fast because there is almost no server load, and the risk of hacking is low because there is no database. There is also almost nothing to manage. This is the most realistic method for someone who doesn't know coding to start out.
**Step 1 — Gathering 3 Essential Items**
**① Select an AI Tool**
**Use Claude or ChatGPT. This article explains based on Claude, but the same applies to ChatGPT. Both are available for free. If you are new to choosing an AI tool, it is helpful to first refer to Truly Free! A Comprehensive Guide to AI Tools You Can Use Right Now, which compares currently available free AI tools.**
**② Apply for Dothome Free Hosting**
**Sign up at Dothome (dothome.co.kr) and apply for free hosting. When applying, select "Personal Blog" as the hosting purpose. Approval usually takes a few hours to a day. The basic specifications of DotHome's free hosting include 200MB of web storage, 1GB of monthly traffic, PHP support, 1 MySQL instance, and FTP access, which are sufficient for operating a personal blog.
③ Install ALDrive
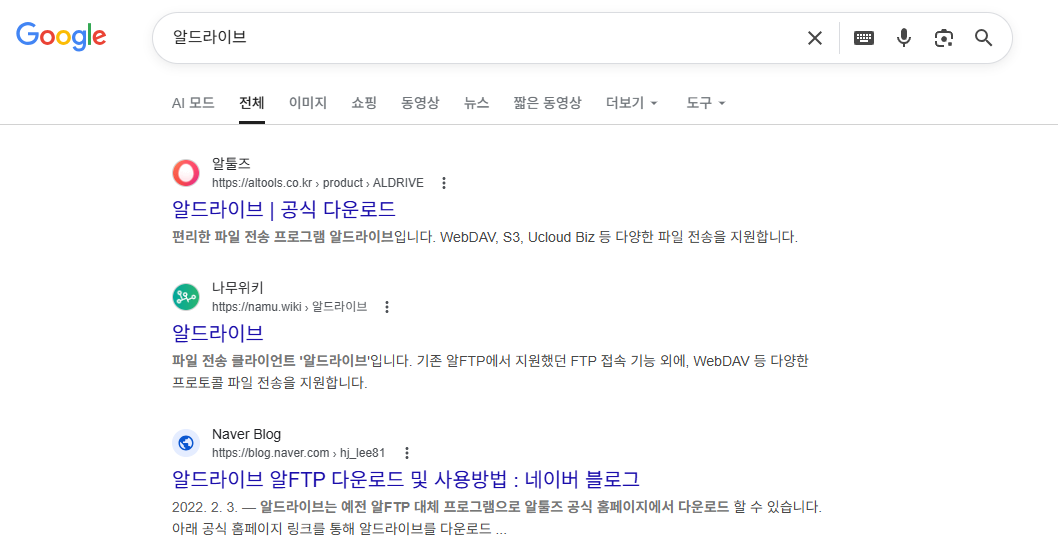
ALDrive is a free FTP program created by ESTsoft. It features a Korean interface, making it easy for even beginners to use. Since it is a program from the same company as ALZip and ALYac, many people are familiar with it. Search for ALDrive on the official ESTsoft website or Google, download it, and then install it.

Step 2 — Asking the AI to Create Blog HTML
Once you are ready, request the AI to create the blog. You can copy the prompt below exactly and paste it into Claude or ChatGPT.
Basic Blog Creation Prompt
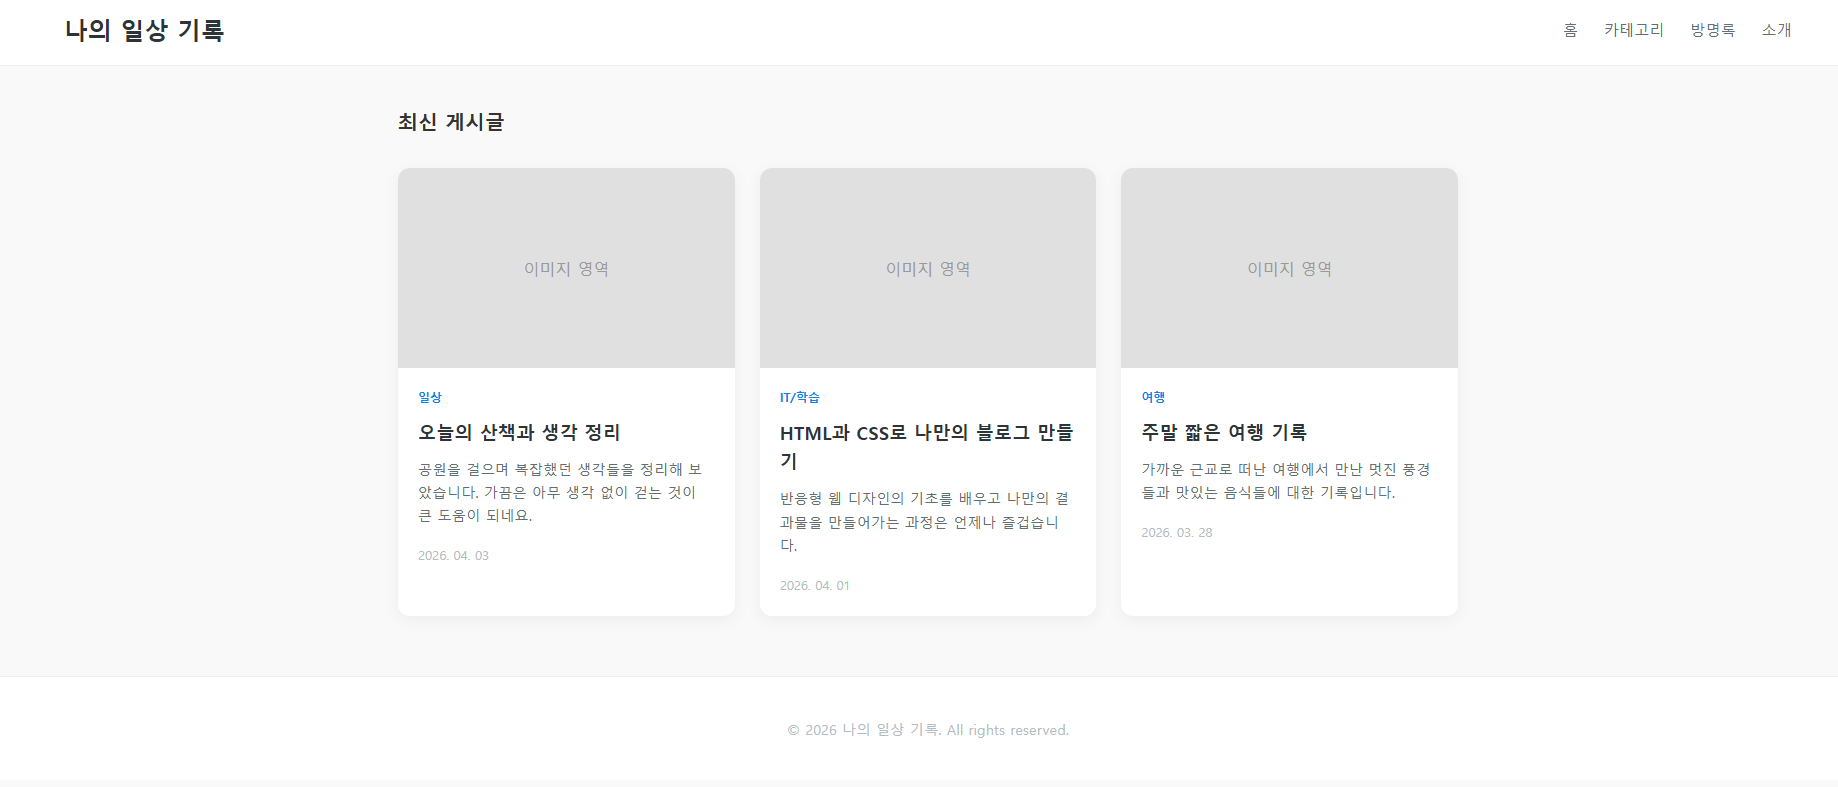
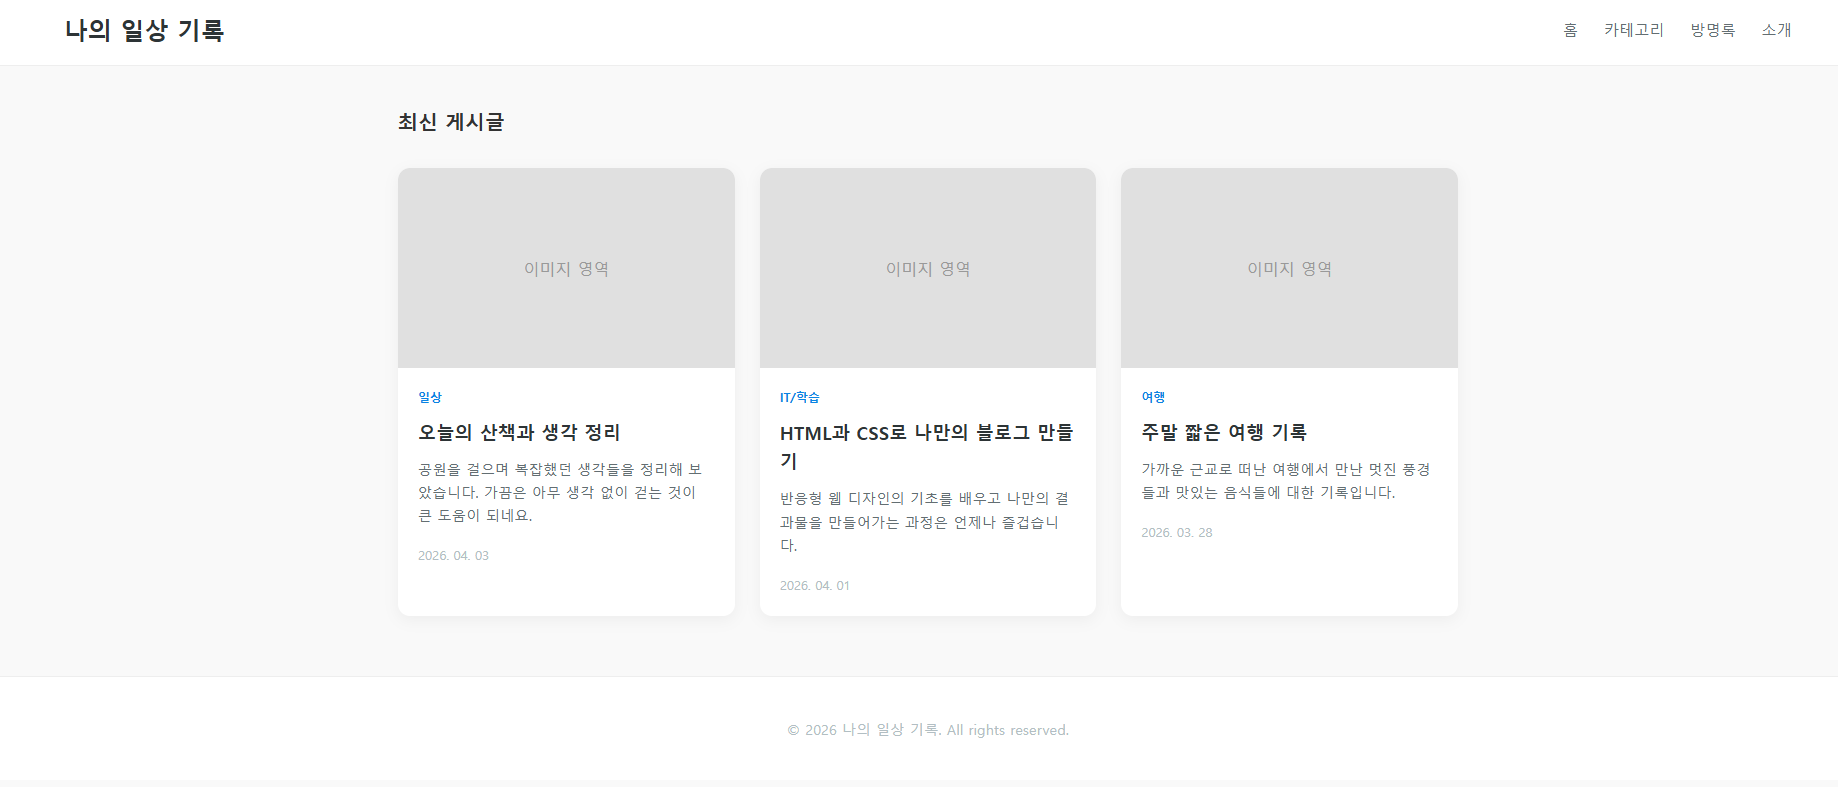
Please create a one-page personal blog HTML file. The structure will have the blog name and menu at the top, a list of recent posts displayed in a card format in the middle, and a footer at the bottom. Please make it responsive so it displays well on mobile. Include the CSS within the HTML file. Name the blog "My Daily Life Record".
Once the AI generates the completed HTML code, paste that code into Notepad and save the file as index.html. When saving, you must select UTF-8 as the encoding to prevent Korean characters from breaking.

Design Modification Additional Prompt
If you are not satisfied with the initial result, request further modifications. For color changes, you can request, "Change the overall color to a navy blue tone. Make the background light gray." For adding categories, request, "Add a category menu. Set the categories to four: Daily Life, Restaurants, Travel, and Reviews." You can complete your desired design without any coding knowledge by making conversational requests, such as "Please add a dark mode toggle button to the top right."
**Step 3 — Uploading Files to the DotHome Server via ALDrive**
**Checking FTP Connection Information**
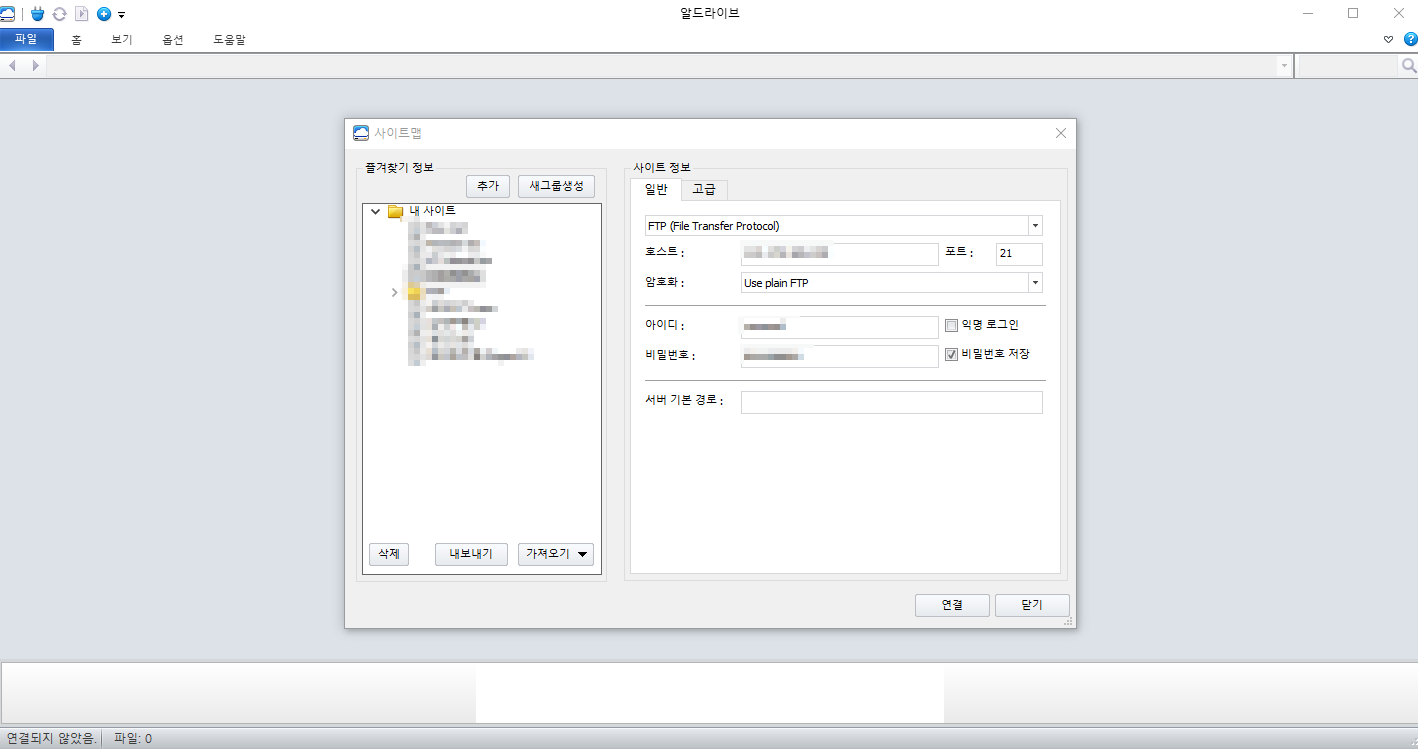
**Log in to the DotHome homepage and check the FTP connection information under My DotHome → Web Hosting Management. The required information is the Host (server address), ID, password, and port (default 21).**
**ALDrive Connection and Upload Procedure**
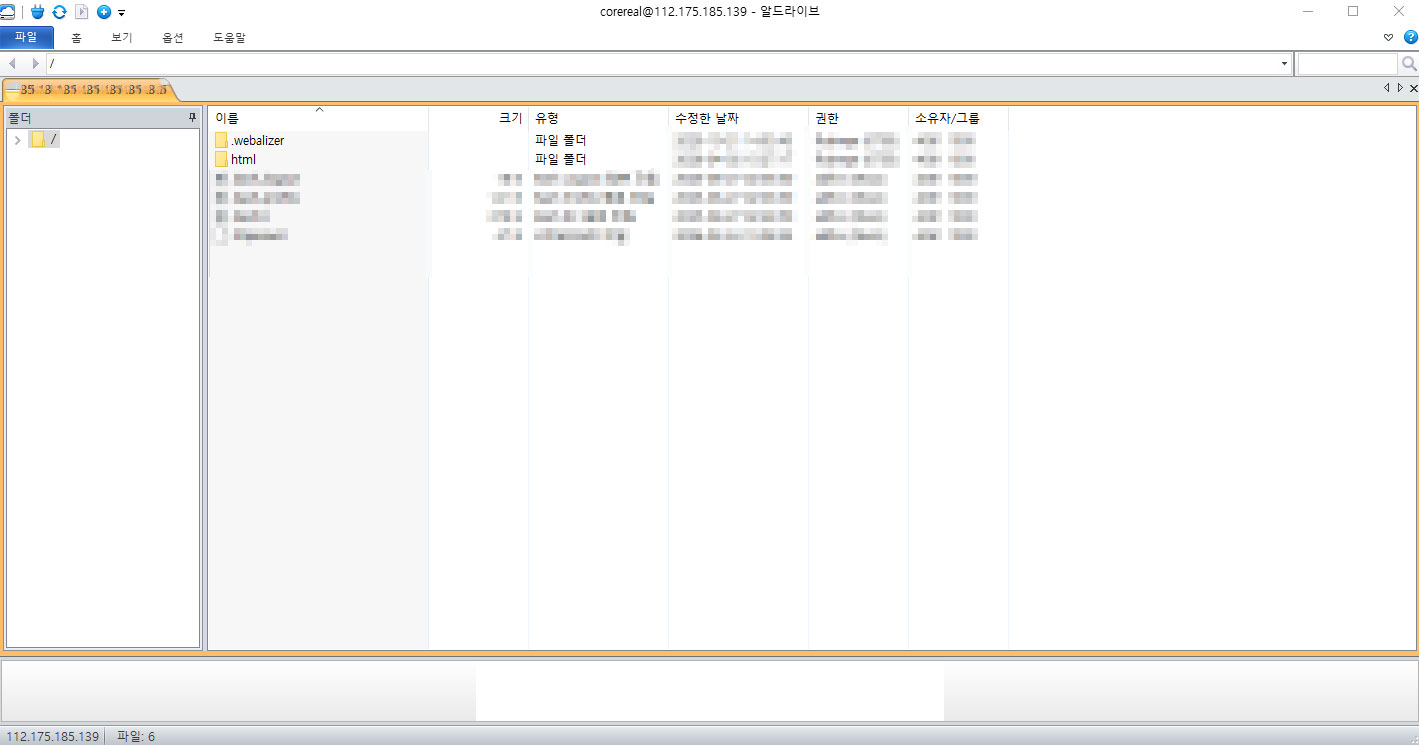
**Launch ALDrive and click the New Site button. Enter the Host, ID, password, and port, then click the Connect button. If the connection is successful, files from your computer will be displayed on the left and server files on the right. On the server side, locate and enter the /html folder. In the case of DotHome, this folder is the web root. Drag and drop the index.html file saved on your computer into the /html folder on the server to complete the upload.


Step 4 — Checking My Blog in a Browser
Open a web browser and enter the address provided by Dothome. The address is usually in the form of http://ID.dothome.co.kr. If the upload was successful, the blog created by the AI will appear on the screen.

How to Add a New Post
You can also request the AI to add a new post to your blog. Utilize the prompts below.
To create a new post page, request it like this: "Please create a post detail page with the same style as the blog design below. The title is OOO, and the body content is as follows. The file name will be post1.html. Please also add a 'Return to Home' link at the top." To update the post list on the main page, request it like this: "Please add a new post to the very top of the post list in this index.html. The title is OOO, and the link is post1.html." The new post will be reflected once you re-upload the modified file to ALDrive.
Recommended File Structure
As the number of posts increases, organizing the files as follows makes management easier. We recommend a structure where index.html (main page), about.html (intro page), posts folder (post files), css folder (style.css), and images folder (image files) are placed under the /html folder. If the number of files increases, it is recommended to separate the CSS into a separate file; you can do this by simply asking the AI to "separate the CSS into a separate file."
Useful Precautions to Know
DotHome Free Hosting Limitations
DotHome free hosting has a storage limit of 200MB and a monthly traffic limit of 1GB. Since using many images can fill up the storage quickly, it is recommended to compress images before uploading if possible. If you need free images, you can download them from Unsplash (unsplash.com) or Pexels (pexels.com) without worrying about copyright issues.
Limitations of Static HTML Blogs
There is no comment function by default. If you need comments, you can integrate an external service like Disqus. Although it is difficult to implement a search function yourself, if you do not have many posts, category classification is sufficient.
Always make sure to back up
It is highly recommended to keep a copy of the files uploaded to the server on your own computer as well. Organizing the original files uploaded via FTP into folders makes it convenient when migrating hosting later.
Conclusion — Creating an AI Blog, Summary of the Entire Process
There are four key steps to creating a blog using this method. Apply for free hosting at Dothome, request the AI to generate the blog HTML, upload files to the Dothome server via ALDrive, and check your blog in a browser. You can create and operate a blog simply by conversing with AI, even if you know absolutely nothing about coding.
If you are wondering which AI tools you can use to create and manage content after setting up a blog, it would be helpful to refer to Truly Free! A Comprehensive Guide to AI Tools You Can Use Right Now.